主要是尝试一下把c++这边的函数封装打包给python用,选择nanobind的原因是:1. 优化速度快,2. 生成二进制包小,不过pythonbind11是更为广泛知道的,nanobind也是pythonbind11作者后续做的,可以查看作者写的
总结一下就是:nanobind 同样是一个用于创建 C++ 和 Python 之间绑定的工具,它的目标是简化和加速绑定生成过程。与 pybind11 相比,nanobind 的不同之处在于它专注于较小的 C++ 子集,提供更高效的内部数据结构和性能优化,并引入了一些便利性和质量改进的新功能。
参考资料:
- official code:
- official docs:
- 非常简单的示例:
- 本篇博文的示例代码: (which 耗时 小张同学 3小时找bug)
1. 安装 Install & 查询 Find
注意不同的安装方式在 cmakelist.txt 的写法会不一样,下面会分别举例:
# 1. pip install
python -m pip install nanobind
# 2. conda install
conda install -c conda-forge nanobind
# 3. from source
git submodule add https://github.com/wjakob/nanobind ext/nanobind
git submodule update --init --recursive
那么对应 如果是 1/2 方案则需要走到Python executable去寻找
# Detect the installed nanobind package and import it into CMake
execute_process(
  COMMAND "${Python_EXECUTABLE}" -m nanobind --cmake_dir
  OUTPUT_STRIP_TRAILING_WHITESPACE OUTPUT_VARIABLE NB_DIR)
list(APPEND CMAKE_PREFIX_PATH "${NB_DIR}")
find_package(nanobind CONFIG REQUIRED)
第三方案则是直接定位到那个clone下来的repo
add_subdirectory(${CMAKE_CURRENT_SOURCE_DIR}/ext/nanobind)2. 初步尝试
此次直接copy的官方文档的方案进行快速尝试
两个文件即可:
新建一个
my_ext.cpp#include <nanobind/nanobind.h> int add(int a, int b) { return a + b; } NB_MODULE(my_ext, m) { m.def("add", &add); }新建一个CMakeLists.txt (注意因为我直接pip install的所以选用的是方案一进行的nanobind的查找)
project(my_project) # Replace 'my_project' with the name of your project
cmake_minimum_required(VERSION 3.15...3.27)
find_package(Python 3.8 COMPONENTS Interpreter Development.Module REQUIRED)

if (NOT CMAKE_BUILD_TYPE AND NOT CMAKE_CONFIGURATION_TYPES)
  set(CMAKE_BUILD_TYPE Release CACHE STRING "Choose the type of build." FORCE)
  set_property(CACHE CMAKE_BUILD_TYPE PROPERTY STRINGS "Debug" "Release" "MinSizeRel" "RelWithDebInfo")
endif()

# Detect the installed nanobind package and import it into CMake
execute_process(
  COMMAND "${Python_EXECUTABLE}" -m nanobind --cmake_dir
  OUTPUT_STRIP_TRAILING_WHITESPACE OUTPUT_VARIABLE NB_DIR)
list(APPEND CMAKE_PREFIX_PATH "${NB_DIR}")
find_package(nanobind CONFIG REQUIRED)

nanobind_add_module(my_ext my_ext.cpp)
搞定,就在此文件夹目录下 终端输入:
cmake -S . -B build
cmake --build build
运行
cd build
python3

Python 3.11.1 (main, Dec 23 2022, 09:28:24) [Clang 14.0.0 (clang-1400.0.29.202)] on darwin
Type "help", "copyright", "credits" or "license" for more information.
import my_ext
my_ext.add(1, 2)
3
至此你完成了一个cpp转python的(感觉这里好像没啥好解释的,看起来就非常易懂,但是!自己操作起来就是另一回事了 欢迎尝试:
3. 复杂尝试
如果感兴趣可以自己先开始干,这是Daniel在ufomap里写的一个timer.hpp文件 [请遵循许可证使用],内含一个巨好用的 Timer 类,一应俱全,正常C++的使用方式是
#include "timing.hpp"

Timing timing;
timing.start("Total");
timing[0].start("One Scan Cost");
// do something.
std::cout<<timing[0].lastSeconds()<<std::endl;
timing[0].stop();

timing[6].start("Write");
// do write file function
timing[6].stop();
timing.print("MyTest" /*title*/, true /*color*/, true /*bold*/);
那么我们同样想在python里使用这个类,需要用pythonbind11或者nanobind进行搭桥,假设我们python的使用要求如下:
import dztimer
from time import sleep

if __name__ == '__main__':
    timer = dztimer.Timing()
    print(timer)
    timer.start("Total")
    timer[0].start("One Scan Cost")
    for i in range(5):
        sleep(0.05 + i * 0.01)
    timer[0].stop()

    for i in range(5):
        timer[1].start("Second Scan Cost")
        sleep(0.08 + i * 0.01)
        timer[1].stop()
    timer.print(title="MyTest", random_colors=True, bold=True)
—— 华丽的分割线 ——
以下为答案部分(不唯一)
#include "timer.hpp"
#include "nanobind/nanobind.h"
#include <nanobind/stl/string.h>

NB_MODULE(dztimer, m) {
    nanobind::class_<Timer>(m, "Timer")
        .def("start", static_cast<void (Timer::*)()>(&Timer::start))
        .def("stop", &Timer::stop);

    nanobind::class_<Timing, Timer>(m, "Timing")
        .def(nanobind::init<>())
        .def(nanobind::init<const std::string &>())
        .def("start", static_cast<void (Timing::*)(const std::string &)>(&Timing::start))
        .def("start", static_cast<void (Timing::*)(const std::string &, const std::string &)>(&Timing::start))
        .def("__getitem__", static_cast<Timing& (Timing::*)(std::size_t)>(&Timing::operator[]), nanobind::rv_policy::reference)
        .def("print", &Timing::print, nanobind::arg("title")="Default", nanobind::arg("random_colors")=false, nanobind::arg("bold")=false,
             nanobind::arg("group_colors_level")=std::numeric_limits<std::size_t>::max(), nanobind::arg("precision")=4);
}
接下来开始从 小张 遇到的一个个bug开始讲起:
Class parent children
如果你要使用的对象是从父类里继承的,那么!分类也要在nanobind里申明!! 这就是为什么小张同学直接call stop的时候 说找不到,所以需要也把父类expose出来
string
#include <nanobind/stl/string.h>这个是报错,然后一脸懵逼 直到chatgpt也无能为力 让我试试最简单的例子,也就是print hello 才发现原来是…. 头文件没加,也就是说如果你的输入参数有std::string 类型 你应该要带上这个头文件 不然会运行报错如下:
Invoked with types: nanobind_example.Timer, str然而还是自己看文档发现不同 无意看到想着加一个试一下 然后就好了…
更多std::的其他函数可能也有这个需求 可以看官方文档的这个include 获取:
[] 操作符重载
其实其他的都有 唯独这个没有,后面才知道原来不需要在python里重载这个 而是用get_item去做这件事,对应的issue还是从pythonbind11里找到解答的:
所以最后才写成了
.def("__getitem__", static_cast<Timing& (Timing::*)(std::size_t)>(&Timing::operator[]), nanobind::rv_policy::reference)Ownership
也就是getitem的时候 之前直接这样写的:
.def("__getitem__", static_cast<Timing& (Timing::*)(std::size_t)>(&Timing::operator[]))but 不报错 但是结果是错的,也只能给出Total的结果,所以很难找到原因,只能求助chatgpt,然后给了一个不存在的方案 但是灵机一动 搜一下最后的nanobind::return_value_policy::reference refernce,发现其实差一点点 他就对了(可能是因为pythonbind11训练样本更多吧
.def("__getitem__", static_cast<Timing& (Timing::*)(std::size_t)>(&Timing::operator[]), nanobind::return_value_policy::reference)也就是在nanobind的 ,提到了类似的:**
Data data; // This is a global variable

m.def("get_data", []{ return &data; }, nb::rv_policy::reference)
所以一修改 哦吼就好了!
4. 本地安装 与 本地上传 pip
本地的话,建议看一下 ,以便漏掉了某个环节
首先是本地可能需要venv去隔离开环境,比如提示我先安装这个py3.8环境:
sudo apt install python3.8-venv然后在对应 dztimer 文件目录下运行:
python3 -m pip install --upgrade build
python3 -m build
打印信息如下,也就是你得到了一个dist文件夹下有库的二进制包了
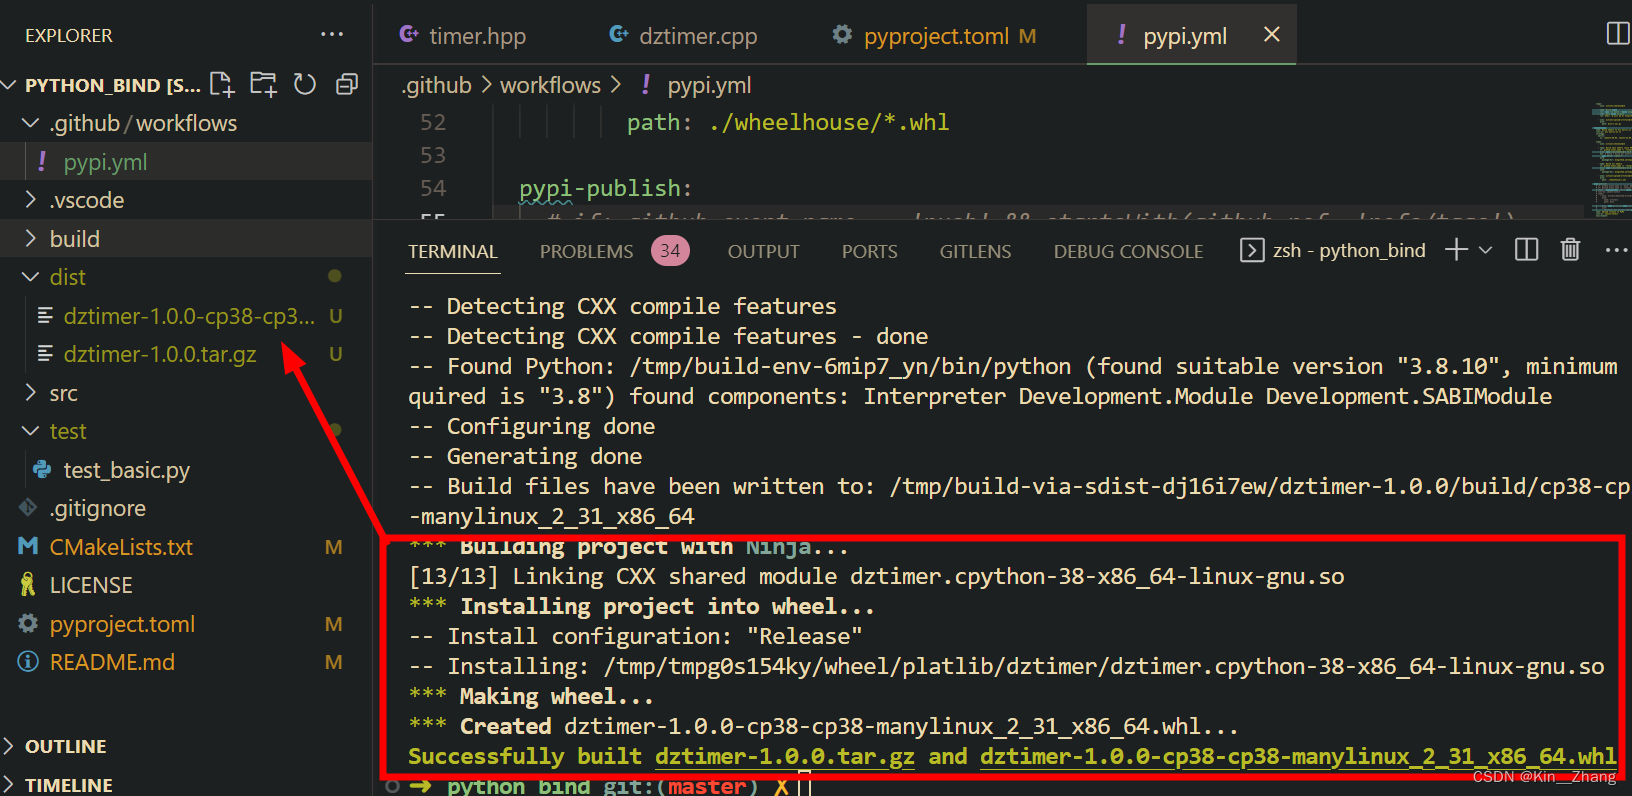
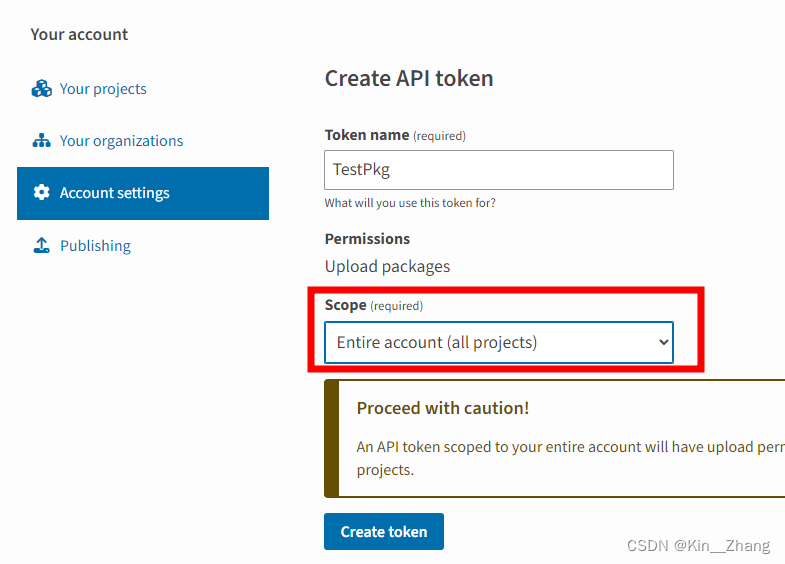
接下来是了解怎么从本地push上去。管理pip install的是pypi这个组织,然后旗下可以先走
步骤是:1. 注册账号,2. 验证邮箱,3. 转到创建API,4. 设置为整个账户,5. 保存到本机上方便上传
接下来,我们需要上传我们的release。为此,我们必须使用上传工具来上传我们的包。PyPI 官方上传工具是twine,所以让我们安装 twine 并在该dist/目录下上传我们的发行版档案。
拿到API token后 set up your$HOME/.pypirc file like this:
[testpypi]
  username = __token__
  password = pypi-AgENd???
然后文件目录下终端输入:
python3 -m pip install --upgrade twine
python3 -m twine upload --repository testpypi dist/*
然后就是提交上去啦 如下就可以看到公开的一个link
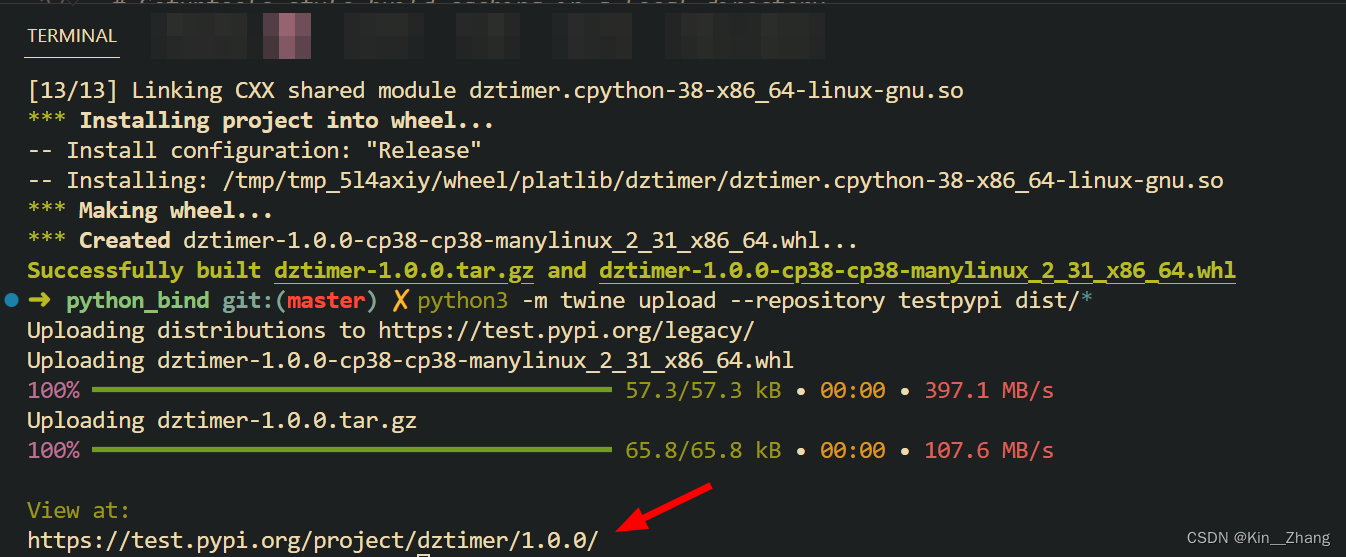
现在可以换个环境下载一下这个包进行使用:
python3 -m pip install --index-url https://test.pypi.org/simple/ --no-deps dztimer但是需要注意的是 你可以看到编译的只有当前环境的py38和 manylinux,所以还需要走到下一步 也就是使用github action的功能来对所有系统 所有版本进行编译并上传
5. 自动提交到pip库内
这样的话 你的包就可以直接pip install 了!想想都觉得成就感(当然 是有意义的哈 别push了一堆example hahaha)【】
但是通常来说我们会使用github去自动完成这个步骤,那么需要了解:
- github repo下的
- github action的工作流程
- name: Publish package to TestPyPI
  uses: pypa/gh-action-pypi-publish@release/v1
  with:
    password: ${{ secrets.TEST_PYPI_API_TOKEN }}
repository-url: https://test.pypi.org/legacy/- example
主要注意的是多平台的支持就需要满足很多coding的严格限制,比如 写这篇的时候 ubuntu迅速通过并push 然而多平台 window macos一直报错
- C++版本要约束好在CMakeLists.txt,特别是使用的库是17的新功能
- 头文件不要拉,比如 array 头文件在ubuntu落了不报错 正常运行 但是其他两个就不行
- 模板类的一系列都要指定好 不能想着让系统自己figure out
以上,更多可以看 这个repo的心路历程… commit都没删
TestPyPI是一个PyPI的分支类似于大家专门先在这里测试一下 然后确认好了 再走到PyPI,两者唯一的区别就是你token给哪个平台的 其余都是一模一样的操作
finally 欢迎大家star 并尝试 python dztimer 希望是一个好用的timing方案
